Transaction Level Inventory
Purpose of Using Transactional Level Data: By using transaction level data from the pos to reconcile inventory, the Series2K system is able to show more accurate inventory results.
Benefits of Transaction Level
- Allows for more accurate inventory results
- Users do not have to back date the sales date for inventory
-
Users do not have to add back in sales prior to counting manually
Once Inventory data has been downloaded into S2K, click on Inventory, then Take Inventory by SKU

Select station from dropdown box and inventory data will load
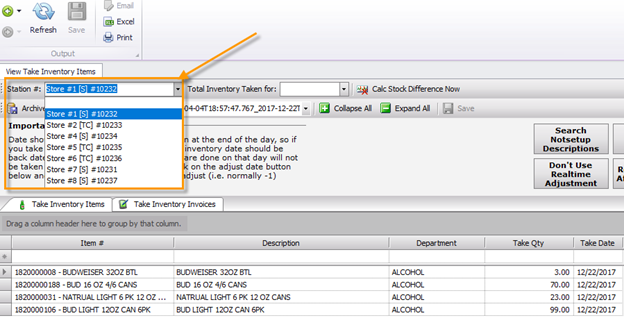
Once the take inventory data has loaded, information should be checked for accuracy and date. Please spot check the following items:
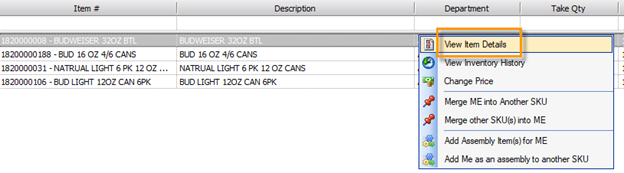
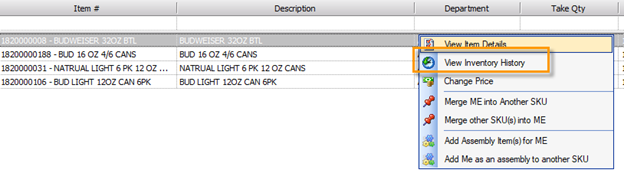
1. Category/Department- check for accuracy and fix any items that are ‘not setup’ or ‘unused’. To update the department, right click on the item and select ‘item details’.
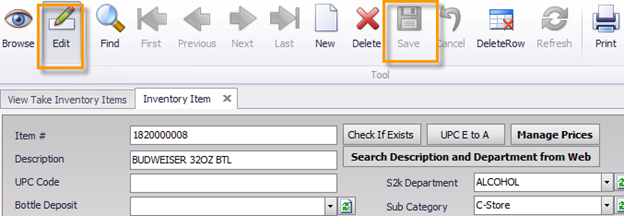
To make changes in the item details screen, click the ‘Edit’ button to make changes and then click ‘Save’.
To look at the history of an item for research purposes, right click on the item and select ‘View Inventory History’. This will show all activity for the item selected.
2. # In Stock– Look for any amounts that appear to be irregular or large and click in the field to fix/change the stock number.
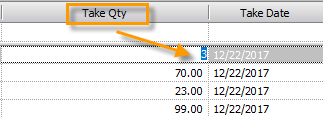
Click the Save button when complete
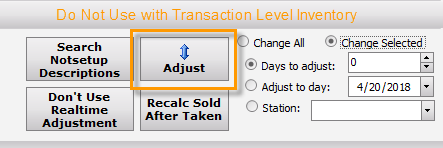
3. Adjust Button- Does NOT apply when using Realtime Inventory. Do NOT adjust the Sales Date.
Once all of the above items have been addressed, the Inventory is ready for processing. Here is an overview of the transaction level inventory features:
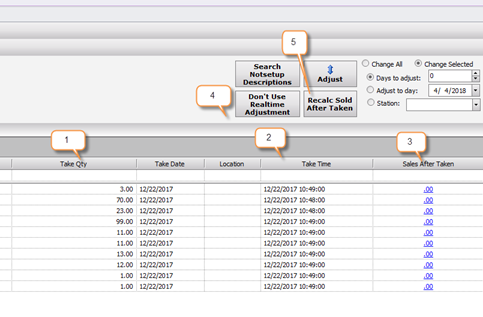
There are 2 steps to processing the Take Inventory:
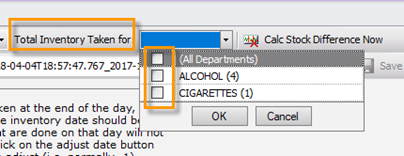
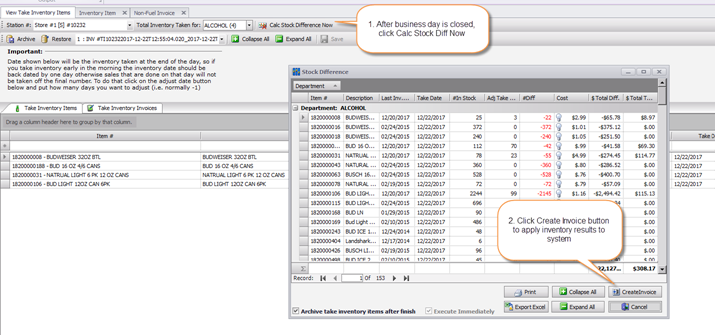
1. Total Inventory Taken For: Check the box next to each department that is a FULL department inventory. The system is designed to zero out any stock levels for items that are not included in the take, if the department box is checked.
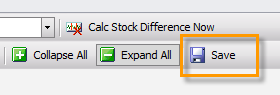
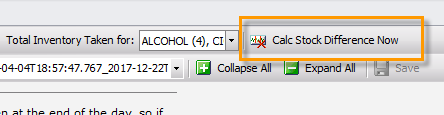
2. Click on the ‘Calc Stock Difference Now’ to complete the processing.
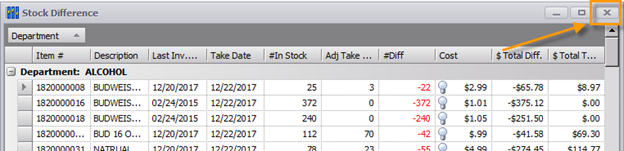
3. A print preview will display, which allows you to check data before final ‘Take Inventory Invoice’ is created. This print preview is designed to show the difference between the current stock level in the system and what was counted in the Take Inventory. Additionally, the overall value of what was counted in the Take Inventory is shown. The system values this difference both in qty and cost.
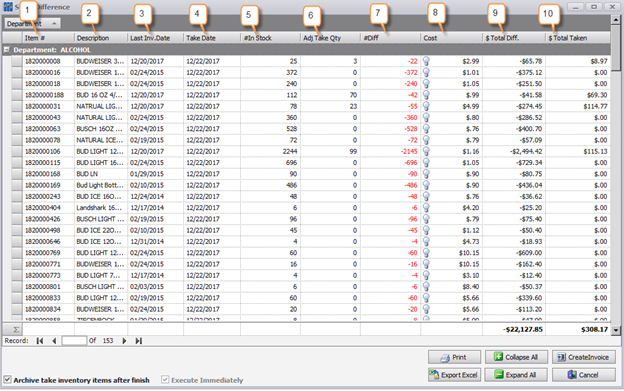
The columns are as follows:
- Item #- UPC
- Description- Item description in S2K
- Last Inv- This is the last invoice date for the item
- Take Date- date assigned as take date on previous screen
- # In Stock- The current stock value in S2K prior to processing ‘Take Inventory’
- Take Qty- Stock value that was provided on previous screen for item
- #Diff- The difference between the # In Stock and Take Qty
- Cost- The current cost for the individual item
- $ Total Diff- The dollar value of the difference at cost
- $ Total Taken- The dollar value of the Take Qty column at cos
4. Close the preview and wait for end of day to load into s2k.
5. After the End of Day has been loaded in S2K- the final step is to ‘Create Invoice’ from the Calc Stock Diff preview.
Click the ‘Create Invoice’ button and the system will upload the inventory and create a ‘Take Inventory Invoice’.
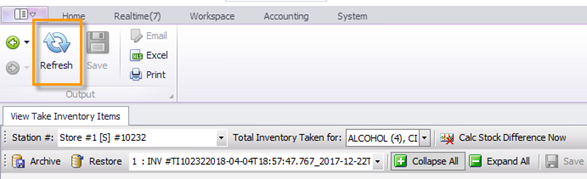
6. Click the refresh button to update the page
7. All Take Inventory Invoices can be found in the ‘Take Inventory Invoices’ tab
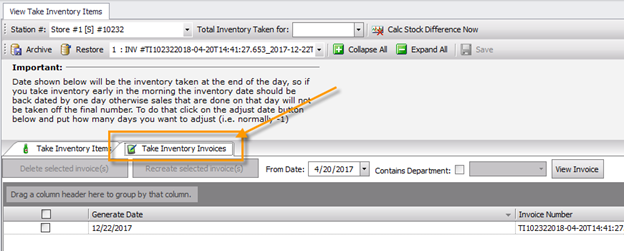
To open the invoice, double click on the invoice in the listing
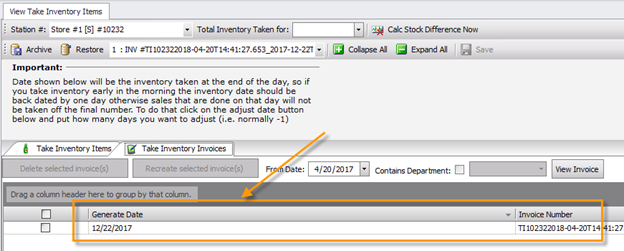
To delete or re-process an existing Take Inventory Invoice, click the box next to the desired inventory date and click either ‘Delete selected invoice(s)’ OR ‘Recreate selected Invoice(s)’.

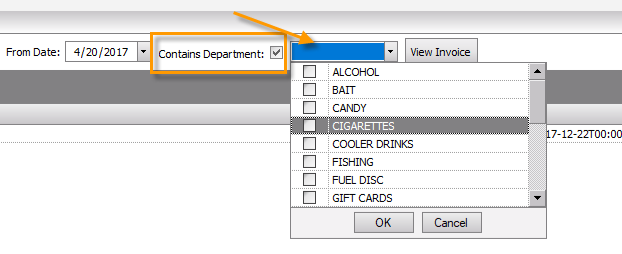
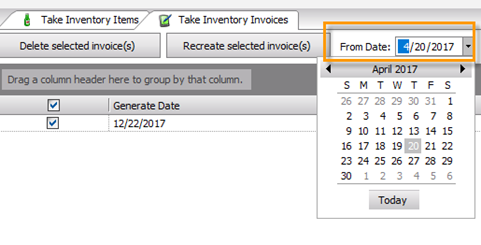
8. To view past invoices, the ‘From Date’ may need to be adjusted from the default. To change the date, select from the calendar in the dropdown box
9. To view just a single department’s Take Inventory Invoices, check the box next to ‘Contains Department’ and select the desired department.