How to Enter a Store Transfer
One method to easily transfer products from one store to another is to use non-fuel invoices:
- Create one invoice to remove the product from Store A (save as master template)
- Create a second invoice to receive the product at Store B (create from master template)
- Use the HH to scan items quickly
- Ability to manage prices for items at new store via invoice
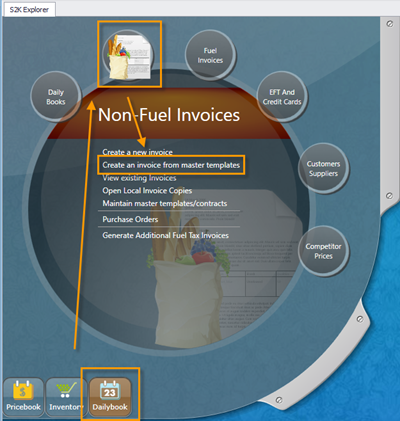
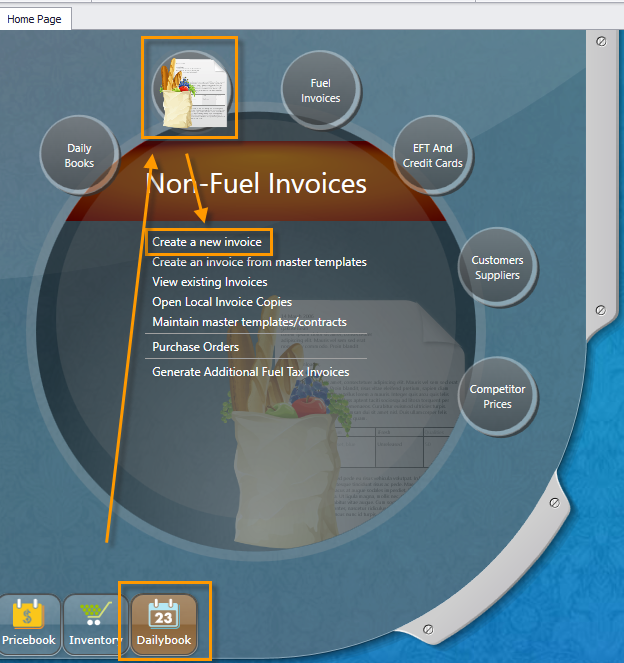
To transfer products, click the Create a New Invoice link from the Non-Fuel Invoices menu
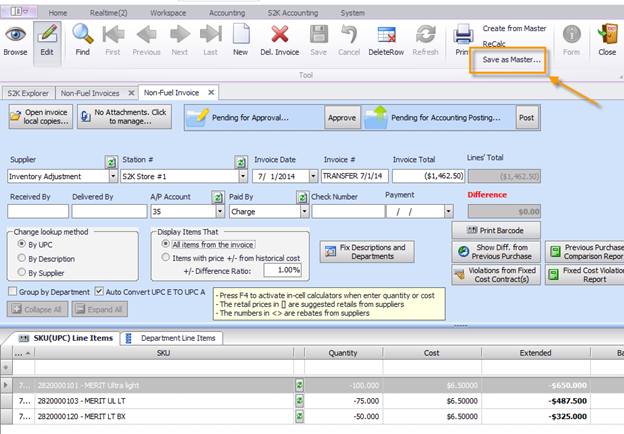
First, create a credit invoice for the store that is removing the product.
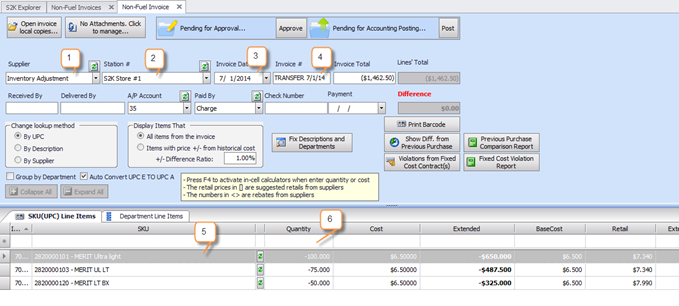
1. Supplier- Use Inventory Adjustment for Supplier name
2. Station- Select station that product is moving FROM
3. Invoice Date- Enter the date the product is leaving the store
4. Invoice #- Use TRANSFER + Date for invoice number, for example TRANSFER 7/1/14
5. SKU- List the items that are moving from one store to another
6. Quantity- The amount should be negative to reduce inventory from store
7. Then, create a purchase invoice for the store that is receiving the product

As a result, the system will move the inventory for the product from one store to another based on the date of the invoice
The invoices can be created either by using the HH scanner or entering them manually in s2k.
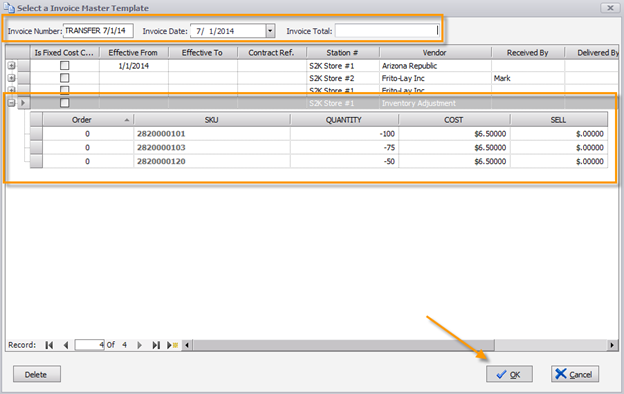
For larger invoices, you can save the initial credit invoice as a master template.
Then use the template to create the purchase invoice for the store receiving the product.