Client Monitor
Below you will find some useful information on how the client can be used.
To get to the S2k Client,locate the tab on the top menu bar shown below.
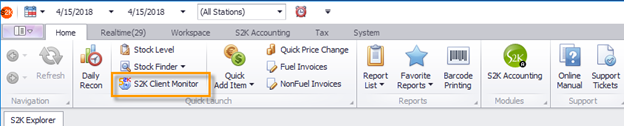
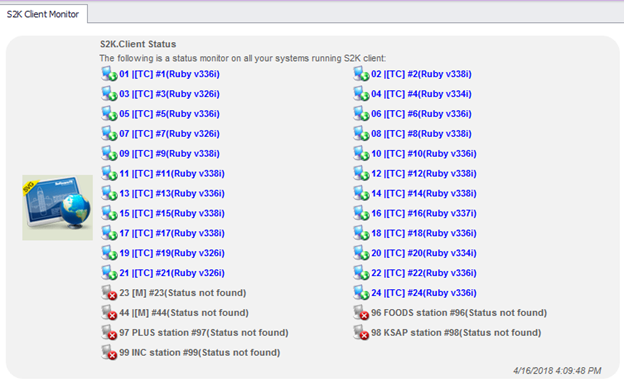
The Client status page will display, showing you all your current stations and their status. Click the individual stations to open the Client interface.
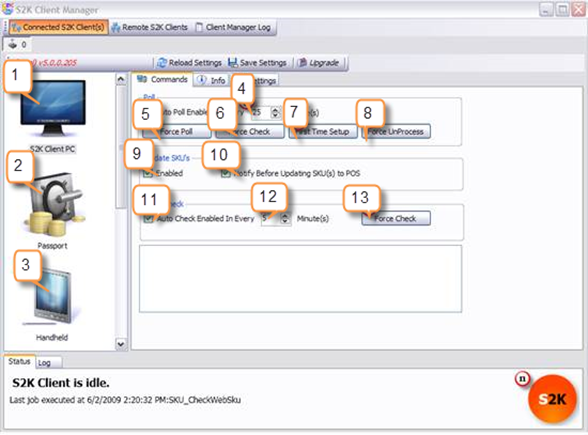
S2K Client Interface Layout
-
S2K Client PC- Clicking this icon will take you to the S2K Client settings page (defaults to this). Please do not change any settings on this screen unless specifically instructed to do so by an S2k technician.
-
POS (Passport shown in above example)- Clicking this icon will take you to POS specific settings. Please do not change these settings unless specifically instructed to by an S2k technician. Doing so can stop the POS from communication with S2k.
-
Handheld- Clicking this icon will take you to the Handheld specific settings page.
-
Auto Poll timer (mins.)- Here you select the time interval that the S2K Client attempts to poll data from the cash register.
-
Force Poll: Polls available data from the cash register. Please do not click this more than once, please note, it can take up to 30 min for data to appear in S2k.
-
Force Check- Checks the connection between the cash register and the back office computer
-
First Time Setup- Downloads cash register settings (dept, pricebook, receipts, etc) and imports them into S2K. WARNING: This is to be used by S2K Staff only.
-
Force Unprocessed- In the event that your station loses Internet access, the S2K Client will still collect your POS files and store them locally on the hard drive. Once you re-gain Internet connectivity, press this button to send your local files to the S2K web server.
-
Enable Update SKU’s- Selecting this option will allow the sending of pricebook changes to the POS.
-
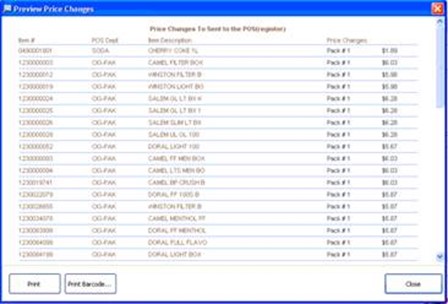
SKU Notification- Selecting this option will hold all price updates in the S2K Client allowing you to review your price changes prior to sending them to the POS.
- Web Check Enabled – leave checked
- Web Check Enabled Timer – leave default setting
- Force Check- Checks for any available price updates on the s2k client server without needing to wait 5 minutes for the system to check.
- Visual Status Indicator- Visual status indicator. Will notify you of any events taking place (price updates, data polling, handheld data
Price change History
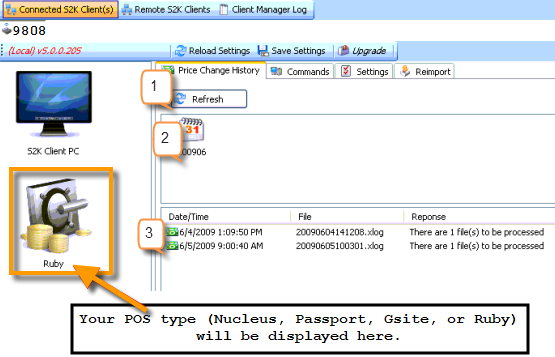
-
Refresh- Clicking this button will refresh the price change history.
-
Price changes for the month- Clicking this icon will show you all of the price updates that were sent for the month.
-
Price change details- Clicking this icon will allow you to view in detail all of the items that were sent to the POS.